Creating templates
Everything in MailCarrier goes around two concepts: Layouts and Templates.
Layouts
Layouts are shared views that can be reused across your templates. They are not required to create a template, but generally recommended.
A layout will contain the basic HTML structure and everything that should be shared such as header and footer. By doing so, in your templates you can focus on the actual content.
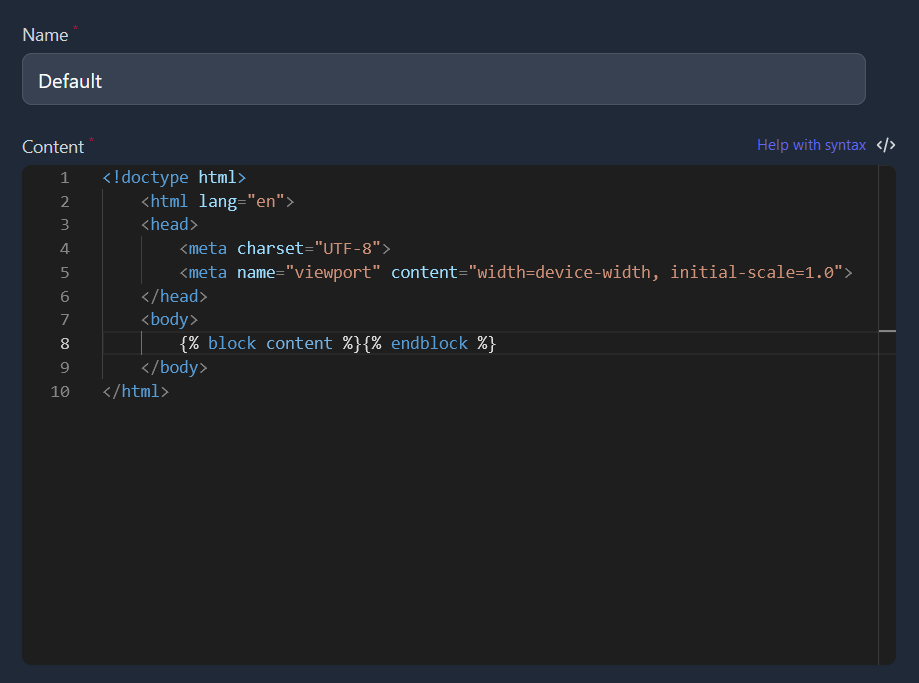
By default, new layouts have a HTML skeleton. Feel free to edit as you wish, just remember to place {% block content %}{% endblock %} wherever you want to render your template content.
Templates
Templates are the actual core of MailCarrier: they contain the email content and all the related design.
On creation it will automatically generate a slug based on the template name: you will use this value to populate the template variable when sending a mail.
Why slug and not ID?
When making the HTTP request to send a mail, it's easier to read and understand what the template welcome refers to, if compared to a UUID 🔖
Syntax
If you're familiar with JS, you will find the syntax very easy and friendly: Twig by Symfony is being used as template engine, providing a fast and expressive way to write your templates.
Learn more
This section only covers a few examples, but Twig offers a lot more: find out everything about the syntax on its official documentation.
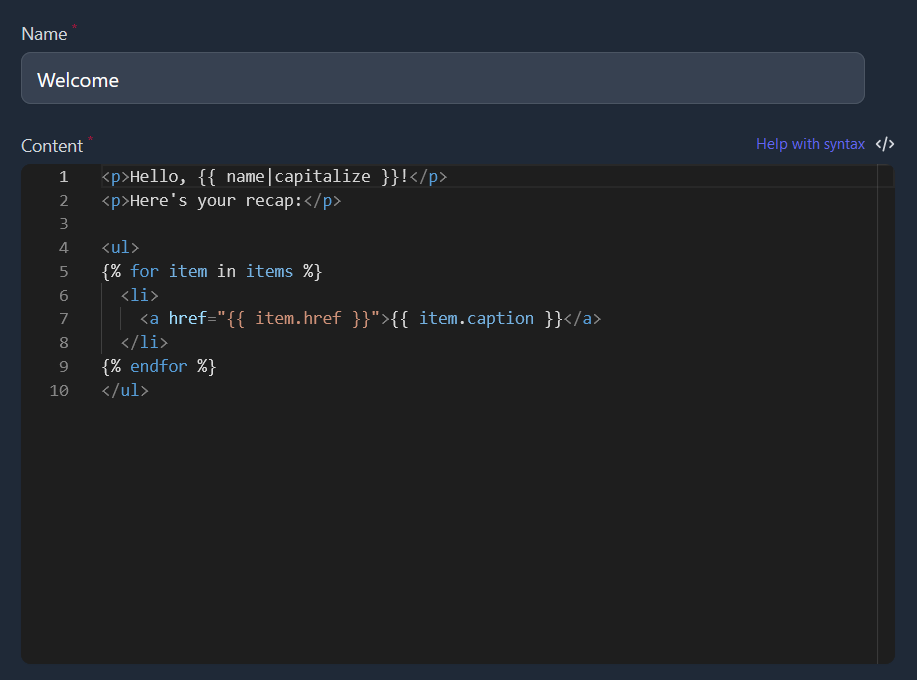
<p>Hello, {{ name|capitalize }}!</p>
<p>Here's your recap:</p>

<ul>
{% for item in items %}
  <li>
    <a href="{{ item.href }}">{{ item.caption }}</a>
  </li>
{% endfor %}
</ul>
Note how we used a filter on the name variable to apply some transformation and then, with a loop tag, we print the content of an array.