Authentication
MailCarrier allows you to choose between two ways to sign in: Standard (Email + Password) or Social.
Standard
During the installation (php artisan mailcarrier:install) you should choose to not enable social authentication.
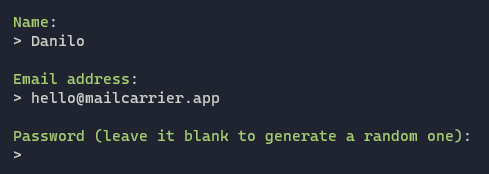
From that point, you can run from your terminal the following command to create new users.
php artisan mailcarrier:user
You can choose to let the system generate a random password for you by leaving that field empty.
Social Authentication
If you would like to enable the social authentication instead of the regular one, you can choose it during the Setup Wizard or setup it later by running:
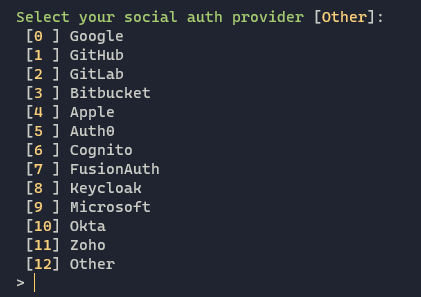
php artisan mailcarrier:socialA list of providers will prompt to auto-install the needed dependencies and configuration.

Once selected, configurations and additional dependencies will be added to your project. Further instructions will be shown to complete the installation.

Redirect URL
The redirect URL must be your App URL with /auth/callback at the end.
For convenience, you can use "${APP_URL}/auth/callback" as value to automatically inject the App URL, just be sure to properly set the APP_URL environment variable.
Other providers
If your provider is not present in that list, don't worry! MailCarrier uses Laravel Socialite to handle social authentication, that means that you can choose from over 150 providers!
To get started, go on Socialite Providers and find your desired one.
In the page of your provider you will find all the instructions to complete the integration that usually are:
- Install the dependency;
- Add the configuration to your
config/services.phpfile and.env; - Listen to Socialite event with your provider.
Finally, remember to set the MAILCARRIER_SOCIAL_AUTH_DRIVER in your .env file to reflect your provider name (all lowercase).
Looking for a real example?
We got you covered! Take a look at our recipe on how to integrate Discord as social authentication provider.
Granting access from social auth
By default, for security reason, every access from social authentication are denied. Of course you can customise and decide how and when a user should be allowed to sign in.
To get started, open the app/Providers/AuthServiceProviders.php file.
In the boot method you will find a callback to tell MailCarrier whether or not accept the current user from a social auth flow and, by default, it returns false, meaning that every access is blocked.
MailCarrier::authorizeSocialAuth(function (\Laravel\Socialite\AbstractUser $user): bool {
    return false;
});
By accessing the $user variable we can, for example, grant access only to a specific email domain:
MailCarrier::authorizeSocialAuth(function (\Laravel\Socialite\AbstractUser $user): bool {
    return str_ends_with($user->getEmail(), '@mailcarrier.app');
});
In this case, only the emails from mailcarrier.app will be allowed.
But there's more! If your provider returns additional fields, such as roles or permissions, you can access those variables to create a fine-grained check.
MailCarrier::authorizeSocialAuth(function (\Laravel\Socialite\AbstractUser $user): bool {
    return in_array('admin', $user->roles);
});
Inspect the user
To inspect the content the current $user variable, try to write dd($user); inside your callback, before any return, and sign in!

